Active Directory Basics
The following presentation is a demonstration of some of the basic administrative tasks that are performed in Active Directory. The machines that I am using are Windows Server 2019, and a Windows 10 workstation. Both machines are virtual machines that I have set up in VirtualBox on an internal network. The purpose of this presentation is to show a demonstrative understanding of Active Directory, and how it works, as well as some administrative tasks on Windows Server 2019. All of the users mentioned in this presentation are fictional users that I made up for training purposes only.
Using Active Directory Users And Computers on Server 2019
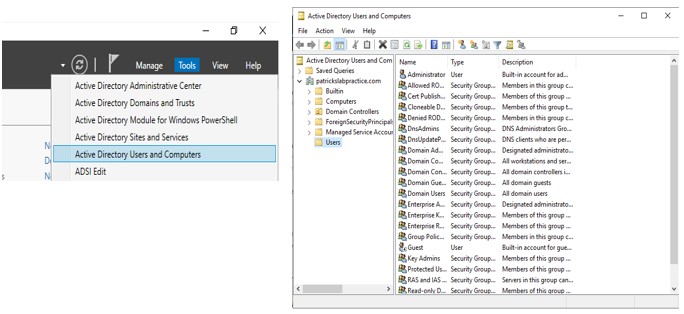
To open the ADUC feature, click on Tools at the top, then select Active Directory Users and Computers.

Creating An Organizational Unit
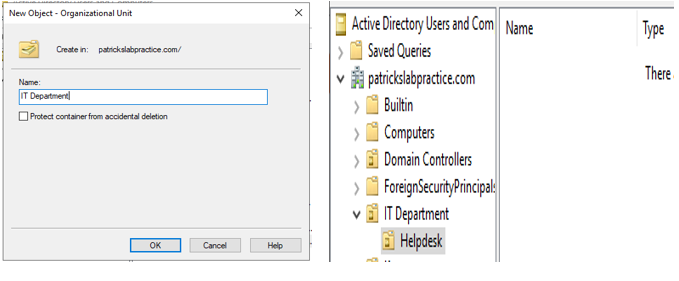
For a basic hierarchical structure, I will use an Organizational Unit (OU) for the main department (IT Department), then a Helpdesk OU.

Creating A Security Group
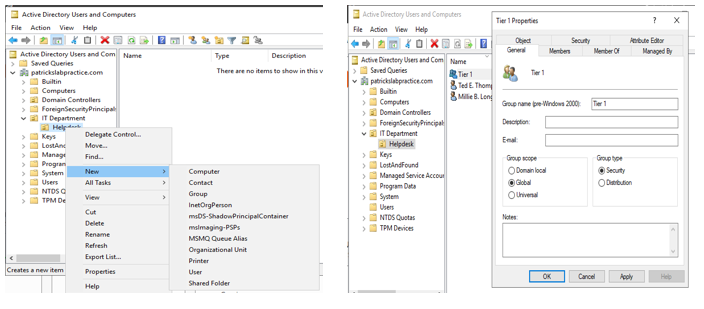
Inside of the Helpdesk OU, I will use a security group for the Tier 1 Helpdesk department. Next, I will begin to add users. To add a security group, right-click on the OU, or right-click inside of the OU space on the right, then select New> Group. Next, give the group a name and click OK.

Creating Users In Active Directory
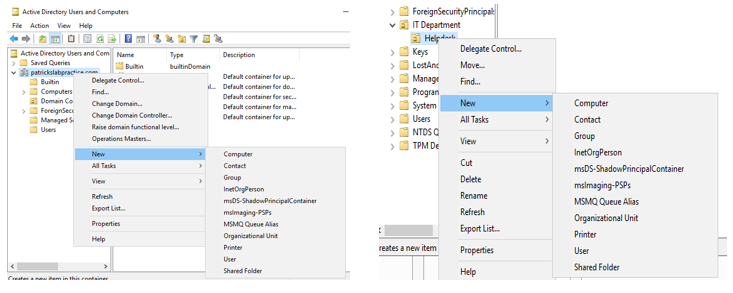
There are a few ways to create users in ADUC, one way is to right-click on the domain name, then select New> User, or Right-Click inside of the space on the right, and select New> User. A specific OU can be selected to add a user as well. I will be adding a couple of users to the Helpdesk OU.

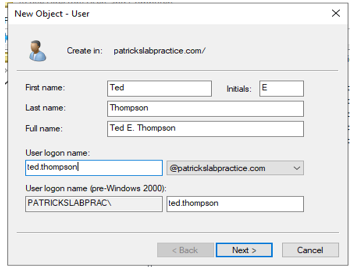
Next, enter the information for the user, and determine what the logon name will be as well. Here, I used the firstname.lastname for the logon format.

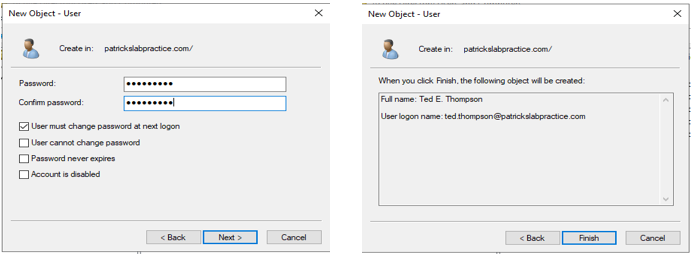
Next, assign a password to the user. Sometimes, in situations such as onboarding, the user will be given a generic password and required to change it next time they login. Click Next, then Finish.

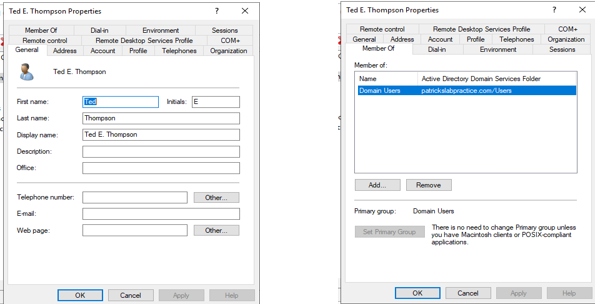
The user has now been created. To see details about the user, right-click on the name and select Properties. To see what groups the user is part of, select the Member Of tab.

Assisting Users With Password Resets
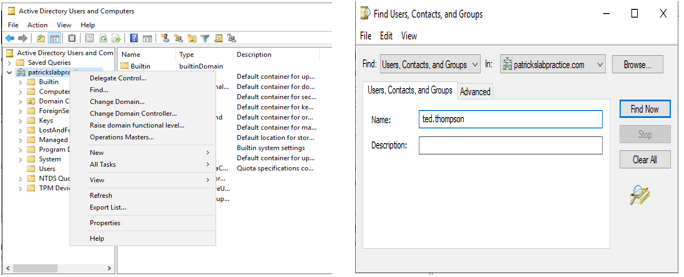
In the event that a user needs to change their password, you would more than likely require the user to first verify at least two forms of ID such as the username, and possibly the last four digits of a number that is unique to them, and only they would know. Once verified, their password can be changed in Active Directory. To change the password, right-click the domain name and click Find, then enter the user’s name and click Find Now.

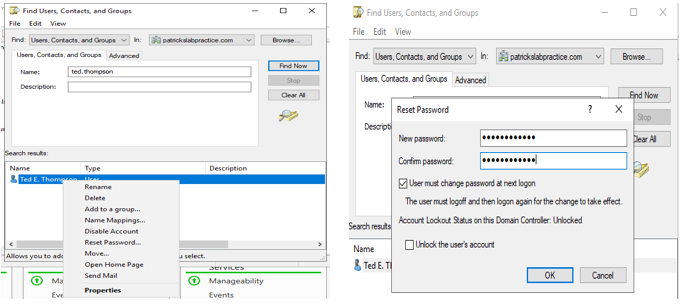
Once you have found the user, right-click their name and select Reset Password. You can also select or unselect whether the user will need to change the password next time they login.

Unlocking A User’s Account
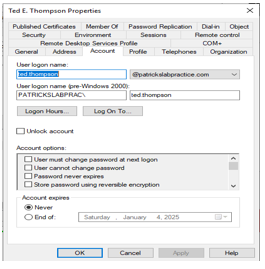
Sometimes a user will get locked out of their account for various reasons. A common scenario is getting a new password, and accidentally entering the old one several times, or entering the new one incorrectly. Another cause, is that their password or account has expired. To unlock the user’s account, verify the user, then right-click the domain name, and find the user. After finding the user, right-click their name, and select Properties> Account> Unlock Account> Apply> OK. A message will be present if their account is locked.

Adding The Users To A Group
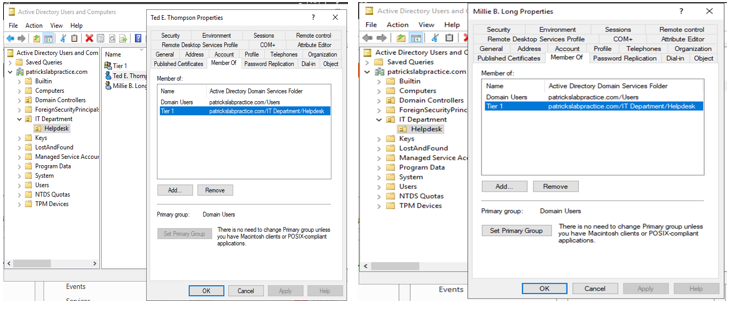
Now that I have created a couple of users, I will add them to the Tier 1 group. To do this, right-click on each user’s name and select Add to a group. Next, enter the group name and click Check Names to verify its existence, then click OK. You can also perform this action from the group, only you would add the users instead.
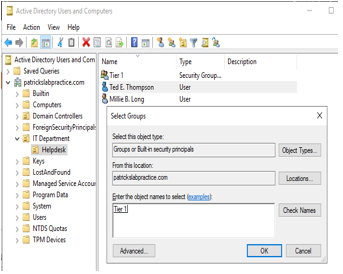

To confirm that the user has been added to the group, right-click the user’s name and select Properties, then click the Member Of tab. Or, right-click the group and select the Members tab. Both Millie and Ted are now in the Tier 1 group.

Accidental Deletion Protection And Removal
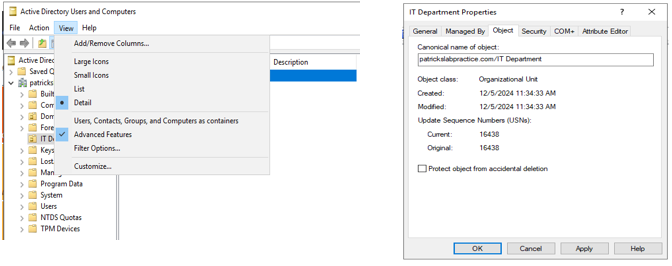
For security reasons, an OU, as well as other items, will be protected from being accidentally deleted. However, the unit, or item may need to be removed. To do this, click on the View tab at the top of ADUC and select Advanced Features. Next, right-click the OU> Properties> Object> deselect the protection option> Apply> OK. You will now be able to delete the OU.

Adding A Computer To A Domain & Name Change
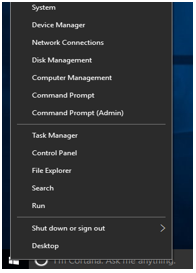
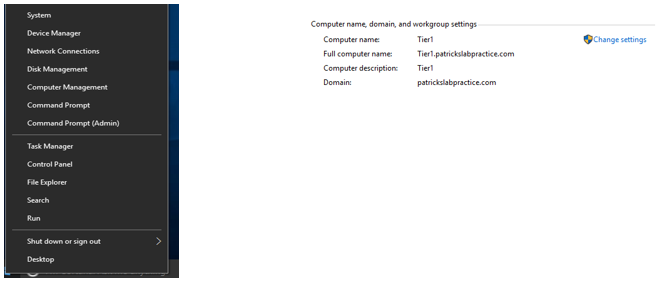
In order for users in a domain to be able to access a computer, it has to be added to the domain. To add a computer to the domain, login to the system as the Administrator> Right-Click Start> System.

Next, select Change Settings where it says Computer Name, Domain, and Workgroup Settings, then select Change. You may also want to add a brief description to the computer.
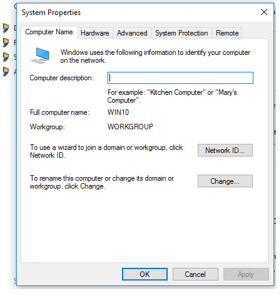

After selecting Change, enter a name that will help identify the computer, and the role that it will be used for. Here, I just called it Tier1 since this department will be using it.
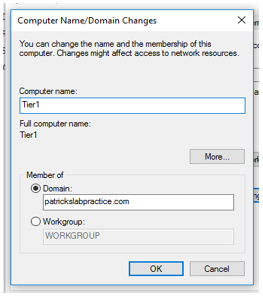

After giving the computer an easily identifiable name, select Domain, then enter the domain name you wish to add the machine to, then click OK. You will then be prompted to enter the Administrator credentials.
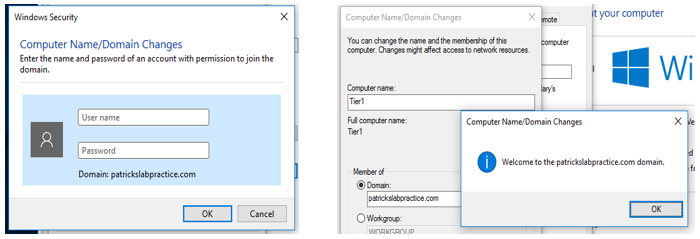

Once this is complete, you will be prompted to restart the computer. Click OK and save any files if needed, then click Apply> Restart Now. The computer should now be added to the domain on the server. To check the domain from the computer, right-click Start then select System.

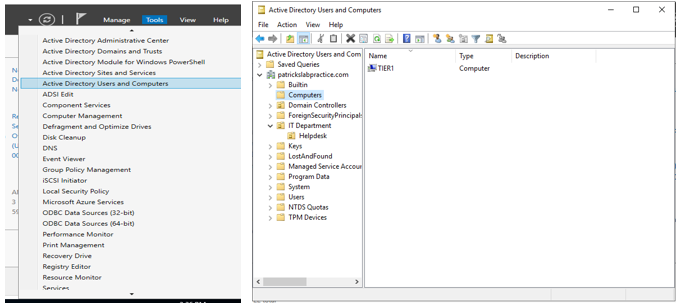
To confirm the computer has been added to the domain from the server, go to Tools> Active Directory Users And Computers> Computers. As shown in the screenshot, the Tier1 computer has now been added.

Addressing A Common Error When Adding A Computer To A Domain
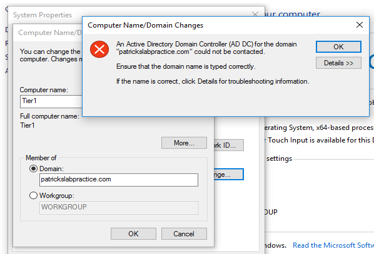
This was an error that I encountered while adding the computer to the domain. For clarity, when I say go to, or switch to a machine in this demonstration, such as the server, I am simply switching back and forth between virtual machines in VirtualBox. In the physical sense and in a business environment, a computer would connect to either a wireless network, or an ethernet cable would be connected to it. I hope this helps if someone has the same issue. To resolve this, here are a couple of things that can be checked. The first one, is ensure the computer is on the same network as the domain. To do this go to the Server and click the Local Server tab. From there, you can view the domain name, and the IP address. Take note of the IP address of the DNS server and make it match the DNS IP address in static mode on the computer you are adding. The IP for the computer itself should be automatic so that it can obtain an address from the DHCP server. I have also broken this solution down into steps below.

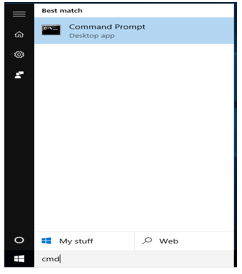
Once you have determined the IP address of the server, switch back to the computer that you are trying to add and click Start, then type cmd. Select Command Prompt. Once the command prompt is open, enter ipconfig /all and see if the computer is on the same network as the server. If it is, follow the steps below to ensure the DNS IP address for the server is matching, and set to static mode. If not, place the computer on the same network as the server.

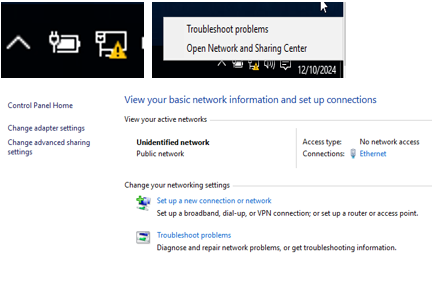
There are several ways to get to this section, but this way is pretty simple and straight forward. At the bottom of the screen right-click the Network icon and select Open Network And Sharing Center. Next, select Change Adapter Settings.

Setting Static Mode For The DNS Server To Fix The Error
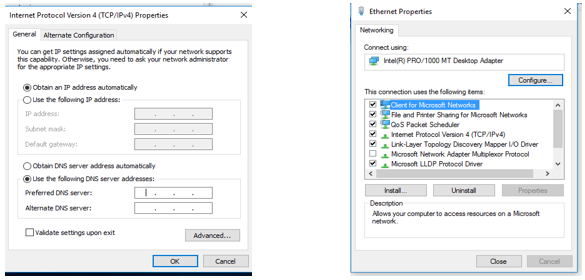
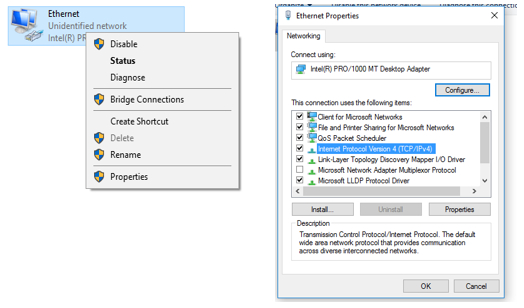
Right-click the Ethernet adapter and select Properties. Next, select Internet Protocol Version 4, then Properties again.

Once the properties window opens, enter the correct IP address for the DNS server, and click OK to save the settings, then select Close on the Ethernet Properties window. You should now be able to add the computer to the domain by following the steps above. As mentioned earlier, you want the computer itself to obtain an IP address automatically from the DHCP server however, the DNS IP address needs to be the same everytime so it will be static.
